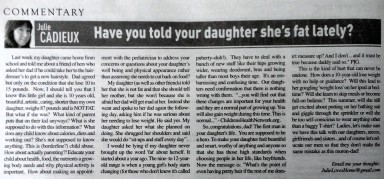
The Tube Dress Throw Pillow Skirt

Tags

, , , , , , , , , , , , , ,

sequins tube dress FOREVER 21

I have teenagers.  Which means I often shop in places like Urban Planet, Forever 21 and American Eagle.  Sometimes, I’ll even come home with a little something for myself.  No, I am not the mom who goes to Pilates wearing leggings with “SASSY” written across her behind, nor am I running to the grocery store in daisy dukes and cropped flouncy tops.  However, when it comes to inexpensive jewelry, scarves or a pair of polka dot flip flops -I’m in!

tube dress

Sometime back in February, I was checking out the clearance racks, looking for deals for the kids when I spotted some really nice holiday tube dresses or should I say tube tops?! (side note: I mean, is it just me or are some of these dresses designed for young women under 4 feet tall!) Anyways, I had a great idea …and for the price, I felt it was worth testing out my little experiment…

sequins aqua tube dress

Once home I made a small cut to the dress liner (using fabric scissors) and removed the built-in bra cups.

cutting the bra cups from tube dress

Next, I grabbed a rectangle (not square) pillow and inserted it to the middle part of the dress and folded the sides inward… and that’s it.  A no sew pillow in an instant!

tube dress turned pillow

Now, obviously this is the kind of throw pillow you don’t have on your TV watching sofa, or on a chair that gets tons of use, because aside from not being comfortable to snuggle with, it isn’t made to be handled: the pillow will eventually work it’s way loose and out of the dress.  However, on a daybed, tucked in a sea of other pillows, in my bedroom -it’s perfect!

tube dress turned pillow

Why don’t I just make a proper DIY pillow and sew it up you ask?  Well this is the best part:  Because for the once a year (if that) where I wish I had a sparkly party skirt, I can have that too -also, in an instant.  Yup, these form-fitting-20-something-club-hopping-tube-dresses, make for a sweet twist on the just above the knee or of the moment midi skirt! (tip:be sure to keep the shirt and shoes simple).

tube dress turned skirt

This past Saturday night, when my daughter started to rummage in my closet to help me choose an outfit for my friends 40th surprise birthday party, I told her that I had it under control and whipped the pillow out of the Tube-Dress-Throw-Pillow-Skirt and slipped it on.  Despite sighing and calling me a mermaid (isn’t that a good thing?) I know she was secretly impressed.

TUTORIAL: The-Tube-Dress-Throw-Pillow-Skirt

So, what do you think?  Any of you have a DIY story of a dress or skirt turned something else?  Feel free to share!

tube dress turned skirt

-Julie

you might also like…

The secret to awesome, moist, chewy, chocolate chip cookies!

Tags

, , , , , , , , , ,

“two words: UNDER BAKE”

secret to awesome moist chewy cookies

I’m not gonna drag this out.  You clicked on this post to find out the secret.  So here it is: UNDER BAKE.  Yup that’s it.  No bizarre ingredients that you have to get shipped to you from another country.  No long thesis about what kind of flour to use depending on the altitude, air pressure or humidity levels. Nope.  Very simply, just don’t bake your cookies according to the recipe instructions (except my recipes of course!).  It’s true.  I have baked up hundreds (possibly thousands) of cookies, tried various recipes and have had 4 different ovens over the years. If the recipe calls for 10 to 12 minutes, try 7 or 8 minutes instead.

Sure, they’ll look pale, soft and well… under cooked, but that’s OK.  Place them on a cooling rack and wait -cuz you see, the cookies actually keep cooking once they’re out.  After 10 minutes the little buggers will firm up and be ready to eat.  And the cool thing is, hours later your cookies will STILL be awesome, soft, moist and chewy instead of the hockey pucks you’re used to!

chocolate chip cookies

Below, I have included a chocolate chip cookie recipe for you.  Oh and here’s another tip: if you can, try to purchase great quality chocolate.  My fave are the milk chocolate Ghirardelli baking chips!

most chocolate chip cookie

JLH Chocolate Chip Cookie Recipe

1 bag or approximately 11 ounces of milk chocolate baking chips.
1 cup salted butter
3/4 cup granulated white sugar
3/4 cup brown sugar, packed
2 large eggs
2 1/4 cups unsifted flour
1 teaspoon baking soda
2 teaspoons vanilla (optional)
1/4 teaspoon cinnamon (optional)

Preheat oven to 375F degrees. In a large bowl, mix the butter and sugars together, add in the eggs, vanilla and cinnamon and blend together.  Next add in baking soda and flour and mix together then incorporate the chocolate chips.

Drop tablespoons size dollops onto a non stick cookie sheet and bake in the centre rack of your oven for 7 to 8 minutes.  Remove from oven and place cookies on a cooling rack for 10 minutes.  Remove cookies from cookie sheet with a spatula and repeat with remaining batter.

Happy International Chocolate Chip Day!

Julie

you might also like…

campaign inspired dresser makeover (in 1 day)

Tags

, , , , , , , , , , , , , , ,

Unfamiliar with what a “campaign” piece of furniture might look like?  Check out Bob Vila, Google or Pinterest.  I’m definitely not the first do this type of DIY!

A little background: I have been looking for 2 identical pieces of furniture for a while now (for over a year!).  Ideally, I wanted a two door style cabinet or even small dressers, to be used on either side of a sofa/day bed in my master bedroom.

The shopping: I have been popping into vintage, antique and thrift shops and have spent hours browsing online at craigslist and Kijiji.  I even happily discovered a used office reseller and a hotel furniture reseller (huge warehouses…soooo fun, I will be back for sure).  BUT, aside from small night tables it was rare to find two matching pieces I liked.  I checked out big box stores like HomeSense, Ikea and even Walmart but the sizes were always wrong.  Once in a while I would check out furniture stores, only to find pieces which would have been gorgeous, but because I needed to purchase two of them, it was way over my budget!

3 drawer dresser makeover DIY

The score: 9a.m last Friday I was browsing through a thrift store I like to frequent and came upon two small almond color 80′s dressers.  Although they were not exactly what I had in mind -sure, the gold strip above the first drawer was a real put off, but they were in excellent shape, very well constructed (by a company in Quebec, Canada -not China!) and the real brass handles had a great vintage look and nicely worn patina.  When I whipped out the measuring tape, I found them to be the PERFECT dimensions for the snug, built-in look I was after.  And at $20 each, I decided I had to take the risk.

The process: On the way home I started thinking that I could quite easily add some L and T brass hardware to trim out the dressers and give them that campaign look.  At my local HOME HARDWARE improvement store, I picked up 3 cans of Krylon white gloss spray paint, then headed over to the hardware isle. That’s when I spotted something different:  These really pretty, curvy, brass drawer corners that I guess I would describe as Moorish in design.

DIY makeover campaign morrocan inspired drawercorner

After some deep contemplation and hesitation I decided to go for it.  After-all, the existing drawer pulls are not true campaign style and at $12 to $20 per drawer pull for the real deal x 6 drawers, I wasn’t exactly thrilled about replacing them, especially since I actually loved the original pulls.

vintage brass handle

The Moorish brass corners come in two sizes: I bought 4 packs of the large ones and 2 packs of the small (4 corners in each pack).  I figured I would put the smaller ones on the first drawer …for extra interest.  OK, fine, that reason and the fact that they only had 4 packs left of the large ones in stock. LOL.  But honestly it was a happy accident … I never do anything just because it’s easy and fast … I am actually pretty picky! (Hello? I waited one whole year to find the perfect furniture pieces to fit in that space in my room didn’t I?!).

white high glossspray paint dresser KRYLON

The DIY: Back home, I removed the pulls, taped off the gold strip and started spray painting.  It took 4 light coats, allowing a couple of hours of drying time in between.  Luckily the weather outside was perfect: no humidity, a little breezy, dry and sunny.  By dinnertime I was putting the drawer pulls back on and installing the “morrocan-ish” drawer corners.

DIY dresser makeover campaign morrocan inspired

The end: Before the hubs got back from his business trip later that evening I had lugged them into our bedroom and began the fun part of styling them!

styled campaign dresser

And then a funny thing happened; I now actually LOVE the once tacky gold strip above the first drawer!

DIY dresser morrocan campaign inspired

Don’t you love it when a project just all comes together?!

DIY morrocan campaign  dresser whiteWhat do you think?

Julie

You may also like…

Master Bedroom

Master Bedroom

nook built in shelves home office

Built In Shelves DIY

MATH ART: 1 DIY art piece = 3

Tags

, , , , , , , , , , , , ,

“DIY art anyone can do!”

A few weeks ago I posted about how my daughter and I were feeling artsy.

me and clo  - making art

Nope.  I did not make that abstract above the craft table -but isn’t it awesome?  It is an original piece I purchased way over a decade ago, unsigned.

watercolor pink aqua blue art abstract DIY

Inspired by some watercolor abstracts I went ahead and made my own.  I finally finished my painting (which I planned for my master bedroom), not that it took long to make.  For 30 minutes I worked alongside my daughter in the study, while she created her own masterpiece.  What took long was to get to the point where I was ready to frame, hang and photograph them.  “Them?” you ask.  That’s right!  The great thing about painting on a large poster board is that you can choose to cut, capture and frame only the parts that you think are best. For tips on how to get going when thinking about making your own art click HERE.

Trust me.  Anyone can do this!  It’s a great way for beginners or non-artists to make art that looks pro!

MATH ART: turning 1 art piece into 3

MATH ART: turning 1 piece into 3

watercolors DIY ART

Watercolors DIY ART

Abstract art JULIE CADIEUX

JULIE CADIEUX abstract art

Julie Cadieux / Abstract Art

What do you think? Is this something you have done -or think you might try?

Julie

You might also like…

Why Not Wednesday : from unused nook to space with a purpose!

Tags

, , , , , , , , , , , , , , , , ,

Poorly designed closet. Unused nook. Awkward alcove.
Why not transform it to maximize storage and space?

In my hubs home office he recently did just that!  He has a nook which should have been a closet (as per our house plans).  But as we built the house I decided to leave it completely open and purposely chose to have it finished as a nook.   I imagined that the little space would be better suited with built-in shelves rather than a closet with a door that would be in the way when it opened into the room.  The hubs installed metal brackets with white melamine shelves but after almost three years the shelves began sagging and to be honest it just never looked attractive and properly finished.  A few weekends ago he tore it all out and after a trip to the hardware store for some pine boards he began making custom shelves that would nicely store all of his office equipment and supplies.

Hubs building pine built in shelves

He measured and planned out what equipment and supplies would go where and passed the necessary wires and cables, hiding them (if he could) in what looks like a solid supporting wood piece going through the middle. We chose to paint out the shelves the same color as the rest of the room so as to not draw any special attention to what’s being stored on them since they aren’t meant for decorative but practical storage purposes.

nook built in shelves home office

Above: I hate wires, but even though you still see a few (bottom shelf) the rest are pretty well hidden.  Below is the view walking into the office.  Notice how you don’t see the shelves at all until you are in the room since they are slightly recessed!

walking into the office

built in shelves in nook/unused closet

Below are some close up pics of the built-ins.

shelves close up

shelves close up

Below: The hubs decided to finish off the top shelf with a piece of (not your typical) decorative molding.

shelves close up

Feeling inspired?  Check these fabulous transformations below (click on the photo to be directed to the source).

Great use of space for a small home...tuck an office into a closet and multi task the chair in the main space for both uses...and the fun color makes the closet/office a gem.

houzz.com

closetworkspacekarmaisabitchquote

letmebeinspired.com

nookcloset.jpg

ThriftyDecorChick.com

Reading Nooks: The unused space beneath the stairs is the ideal spot to create a cozy reading area.

decoratingfiles.com

built in bath nook, took unused awkward space with a slanted ceiling and made it functional

theestateofthings.com

Reading Nook in an unusal small space u dont know what to do with!

apartmenttherapy.com

book nook .. perfect for a tiny unused space

lovelycraftyhome.com

agirlnamedbong.wordpress.com

closet office

source unknown

Shelving Above Toilet - perfect use for normally dead space.  Like the bold wall color behind. So cute for a half bath.

shelterness.com

Styling shelves

JulieLovesHome.com

What do you think?  Is this a DIY project you dream of tackling someday?

Julie

you might also like…

Styling shelves

Living room shelves 2012

Before (living room shelves 2010)

Living room shelves 2010

Follow

Get every new post delivered to your Inbox.

Join 202 other followers